赶在五一之前给乌龟做个自动喂食器
简介
想给几个乌龟做喂食器很久了,一直抽不出时间,只能偶尔搜一下,想想方案。在公司用 Arduino 搞了几个控制方案后,熟悉了就开始干起来了,最主要是又 AI 帮忙了。
为什么不在淘宝买成品?觉得不够好,觉得自己 DIY 更帅,觉得陈年废品可以重获新生了。
update:乌龟自动喂食器2.0升级版
update:乌龟自动喂食器再次升级
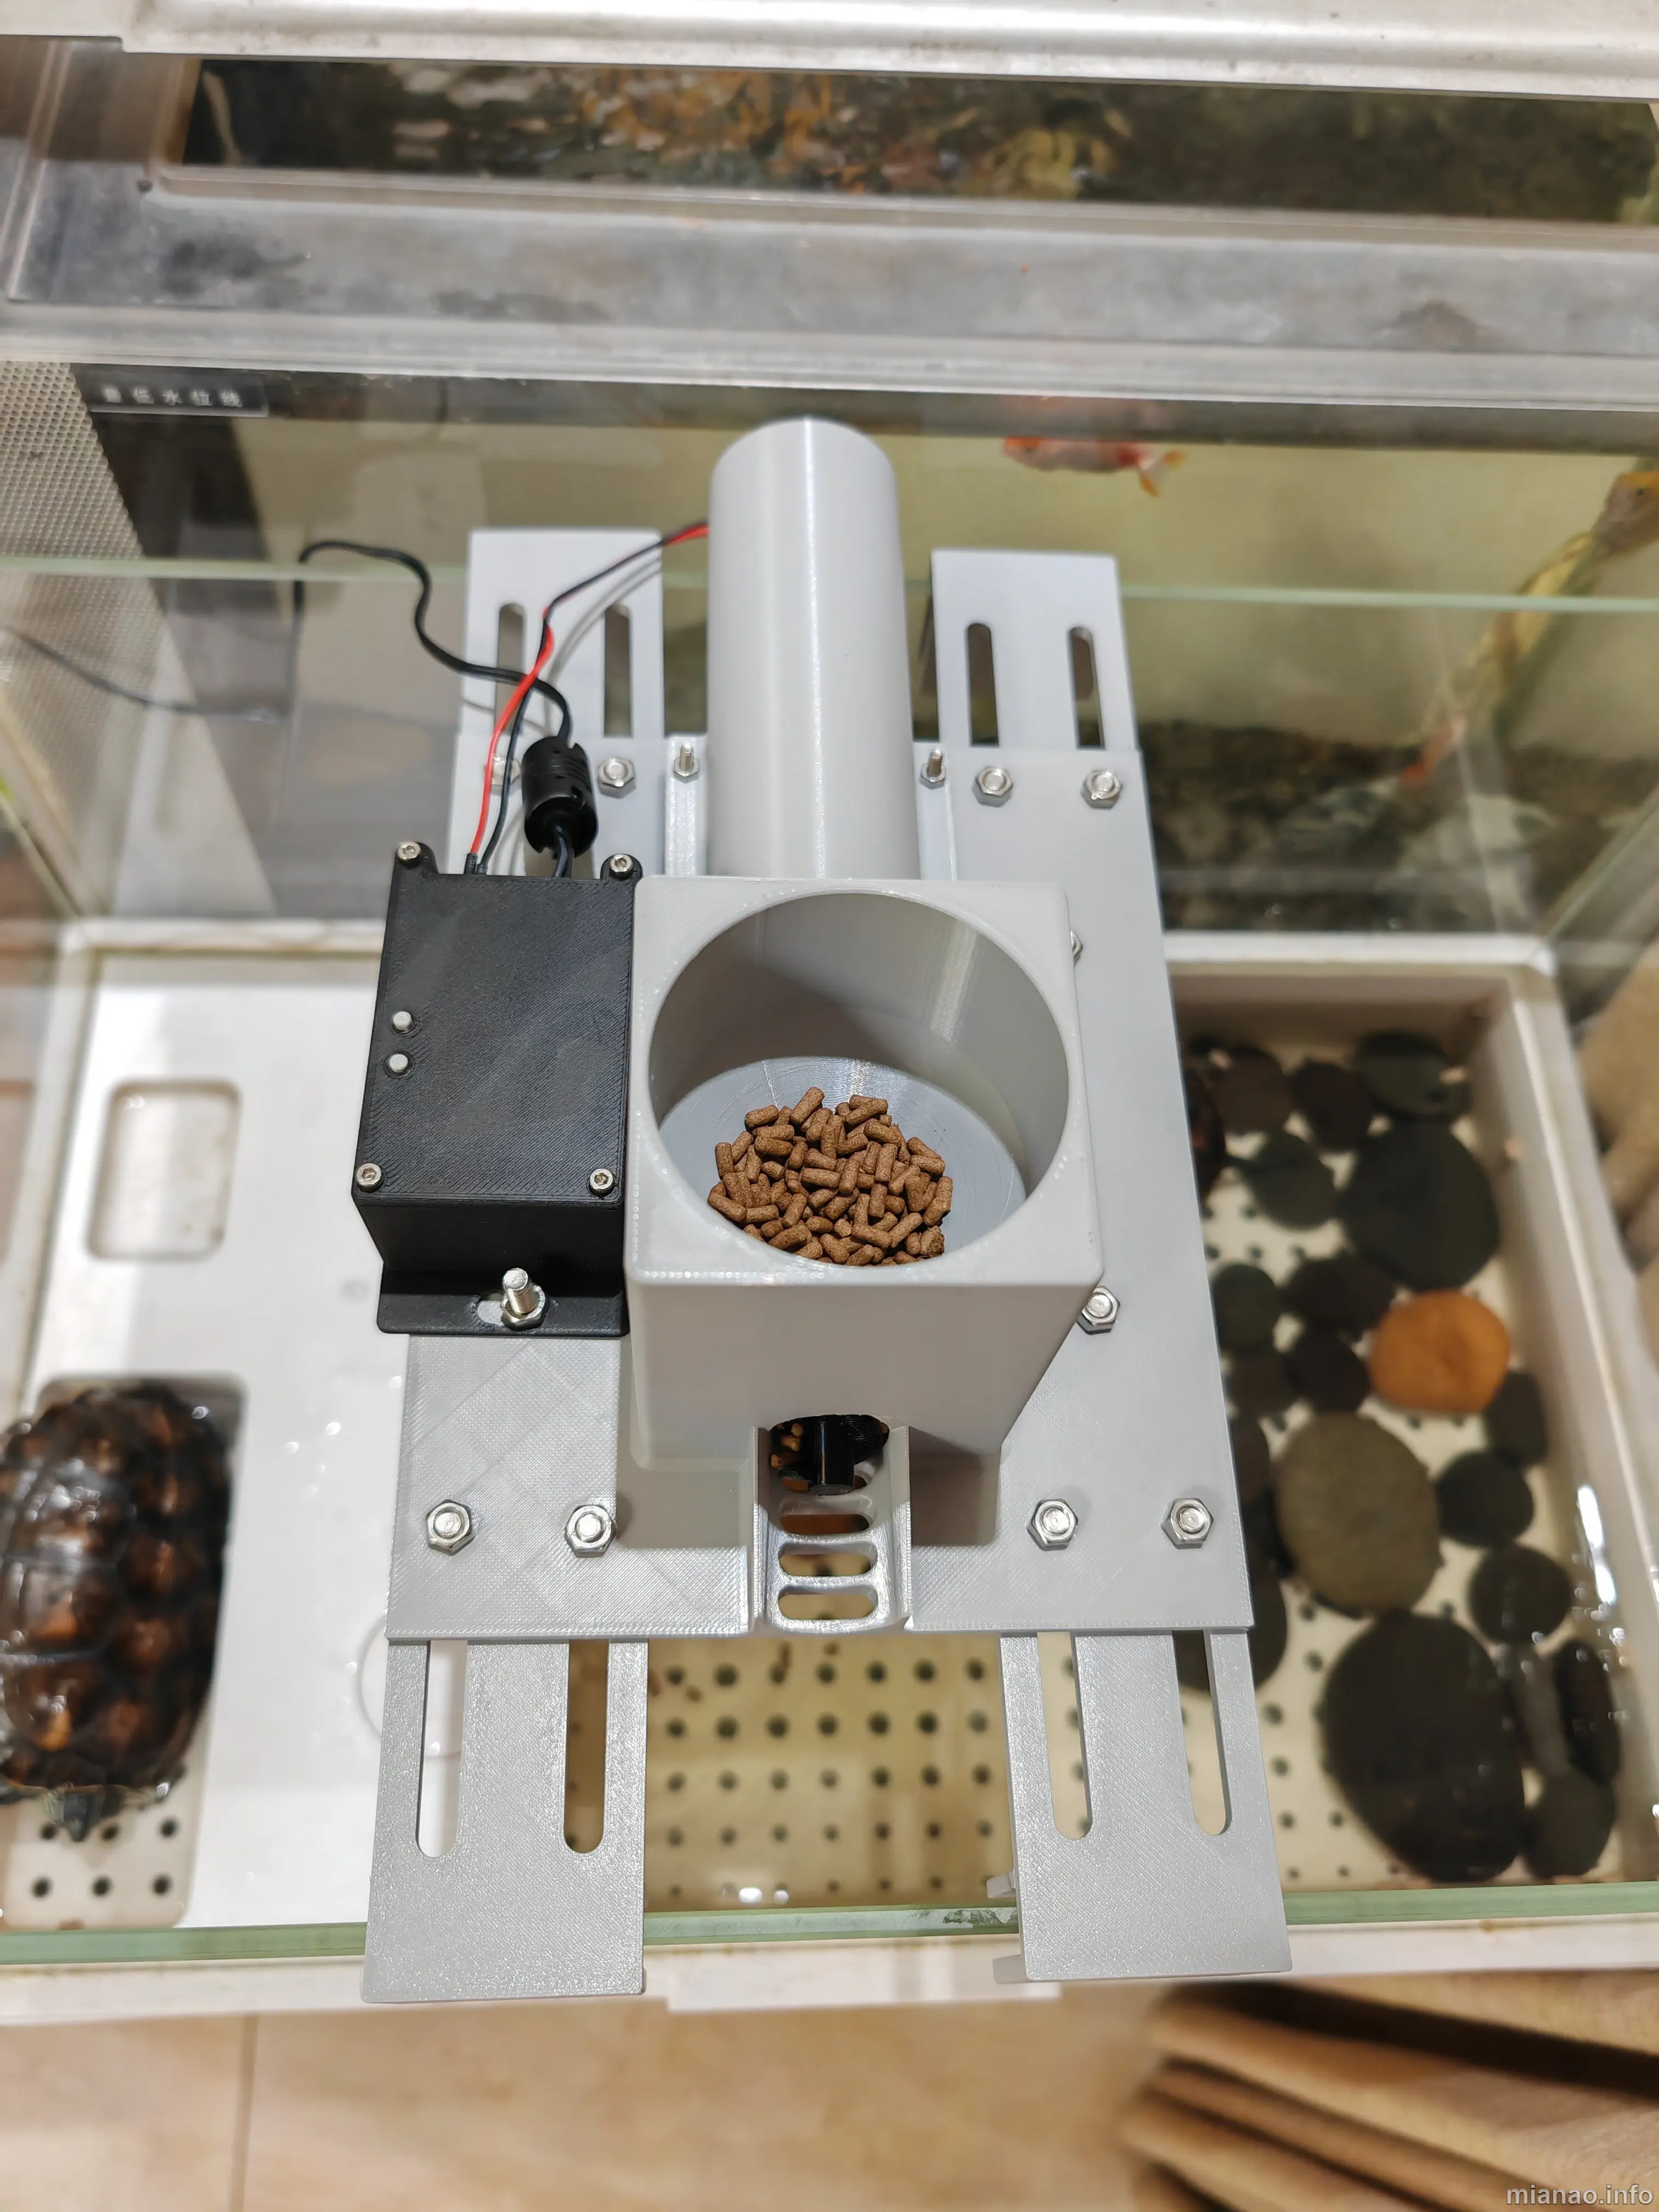
结构设计
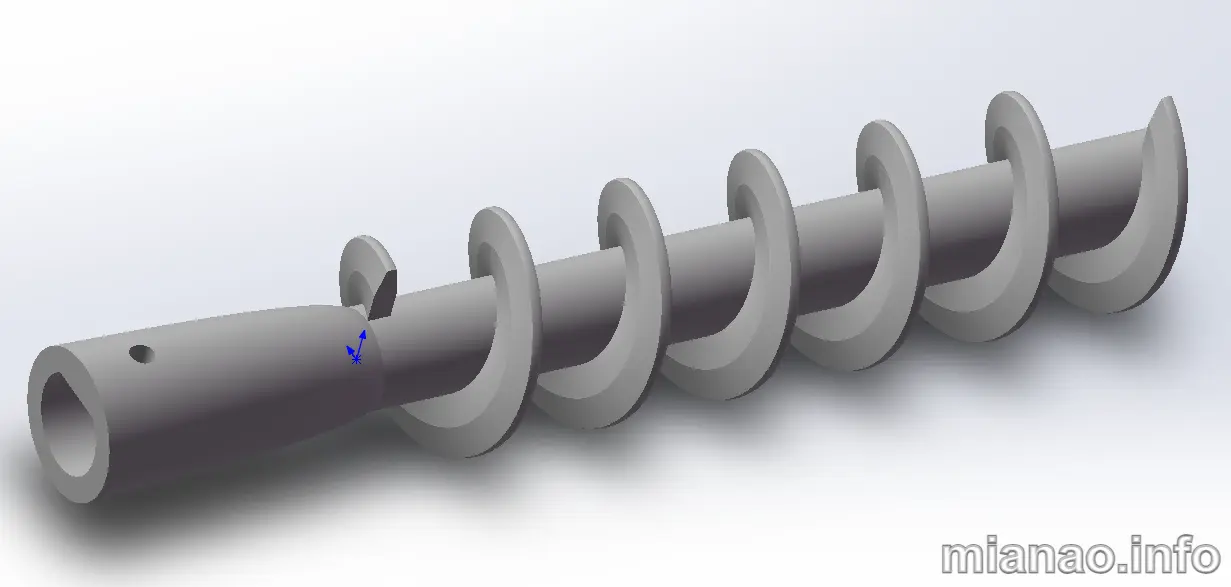
在淘宝看了一下各种自动喂食器,感觉还是用螺旋推食出来比较好一点,结构简洁装配简单不容易出问题,喂食多少只需要调整电机转动时间就好了。
设计软件 Solid Works,设计理念就是结构件越少越好,安装简单,还要方便 3D 打印。
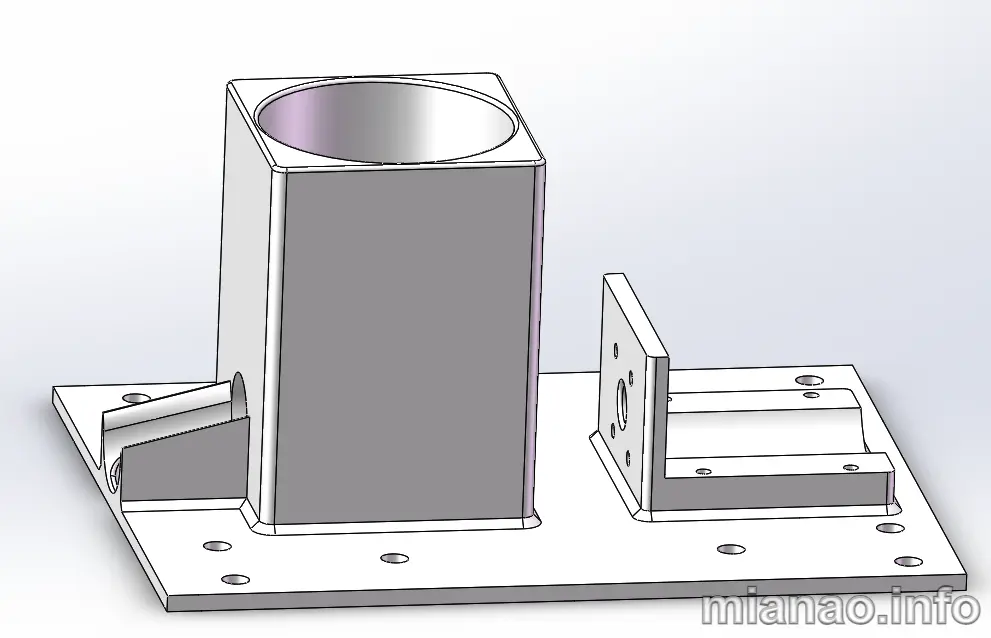
结构分为下面几个部分:
- 底座。安装电机,电路板,容器,螺旋推杆等等,3D 一体打印,比较方便。

- 螺旋推杆。和电机一起固定。
- 电路盒。固定电路板。
- 其他配件。食物容器盖子,电机盖子,支撑夹具等。

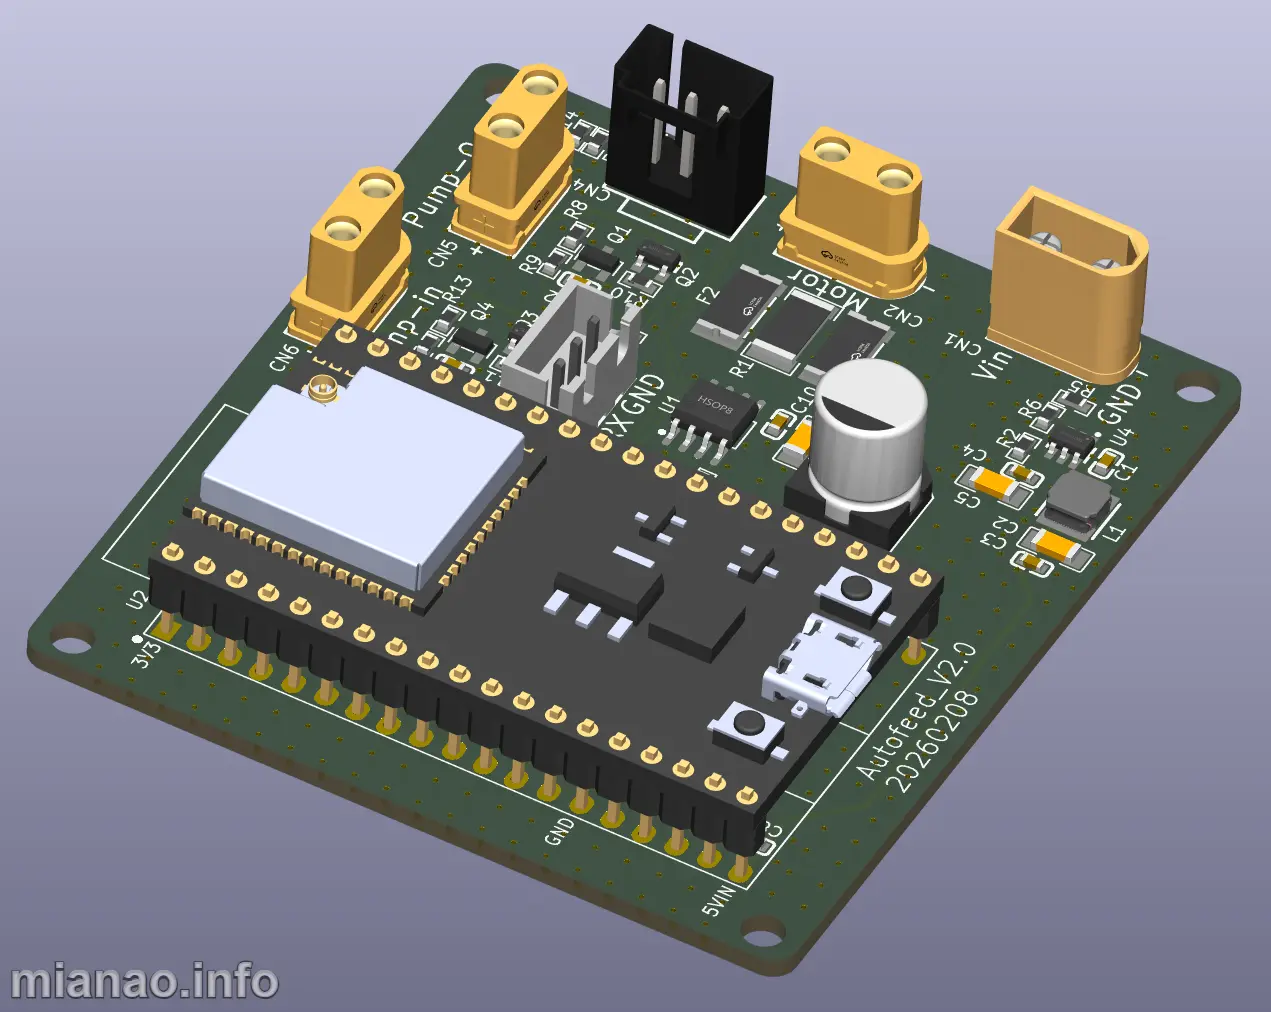
硬件设计
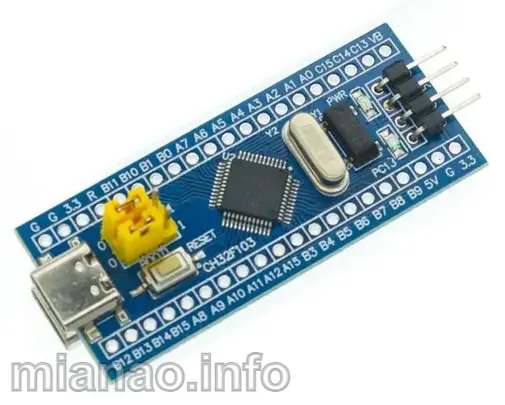
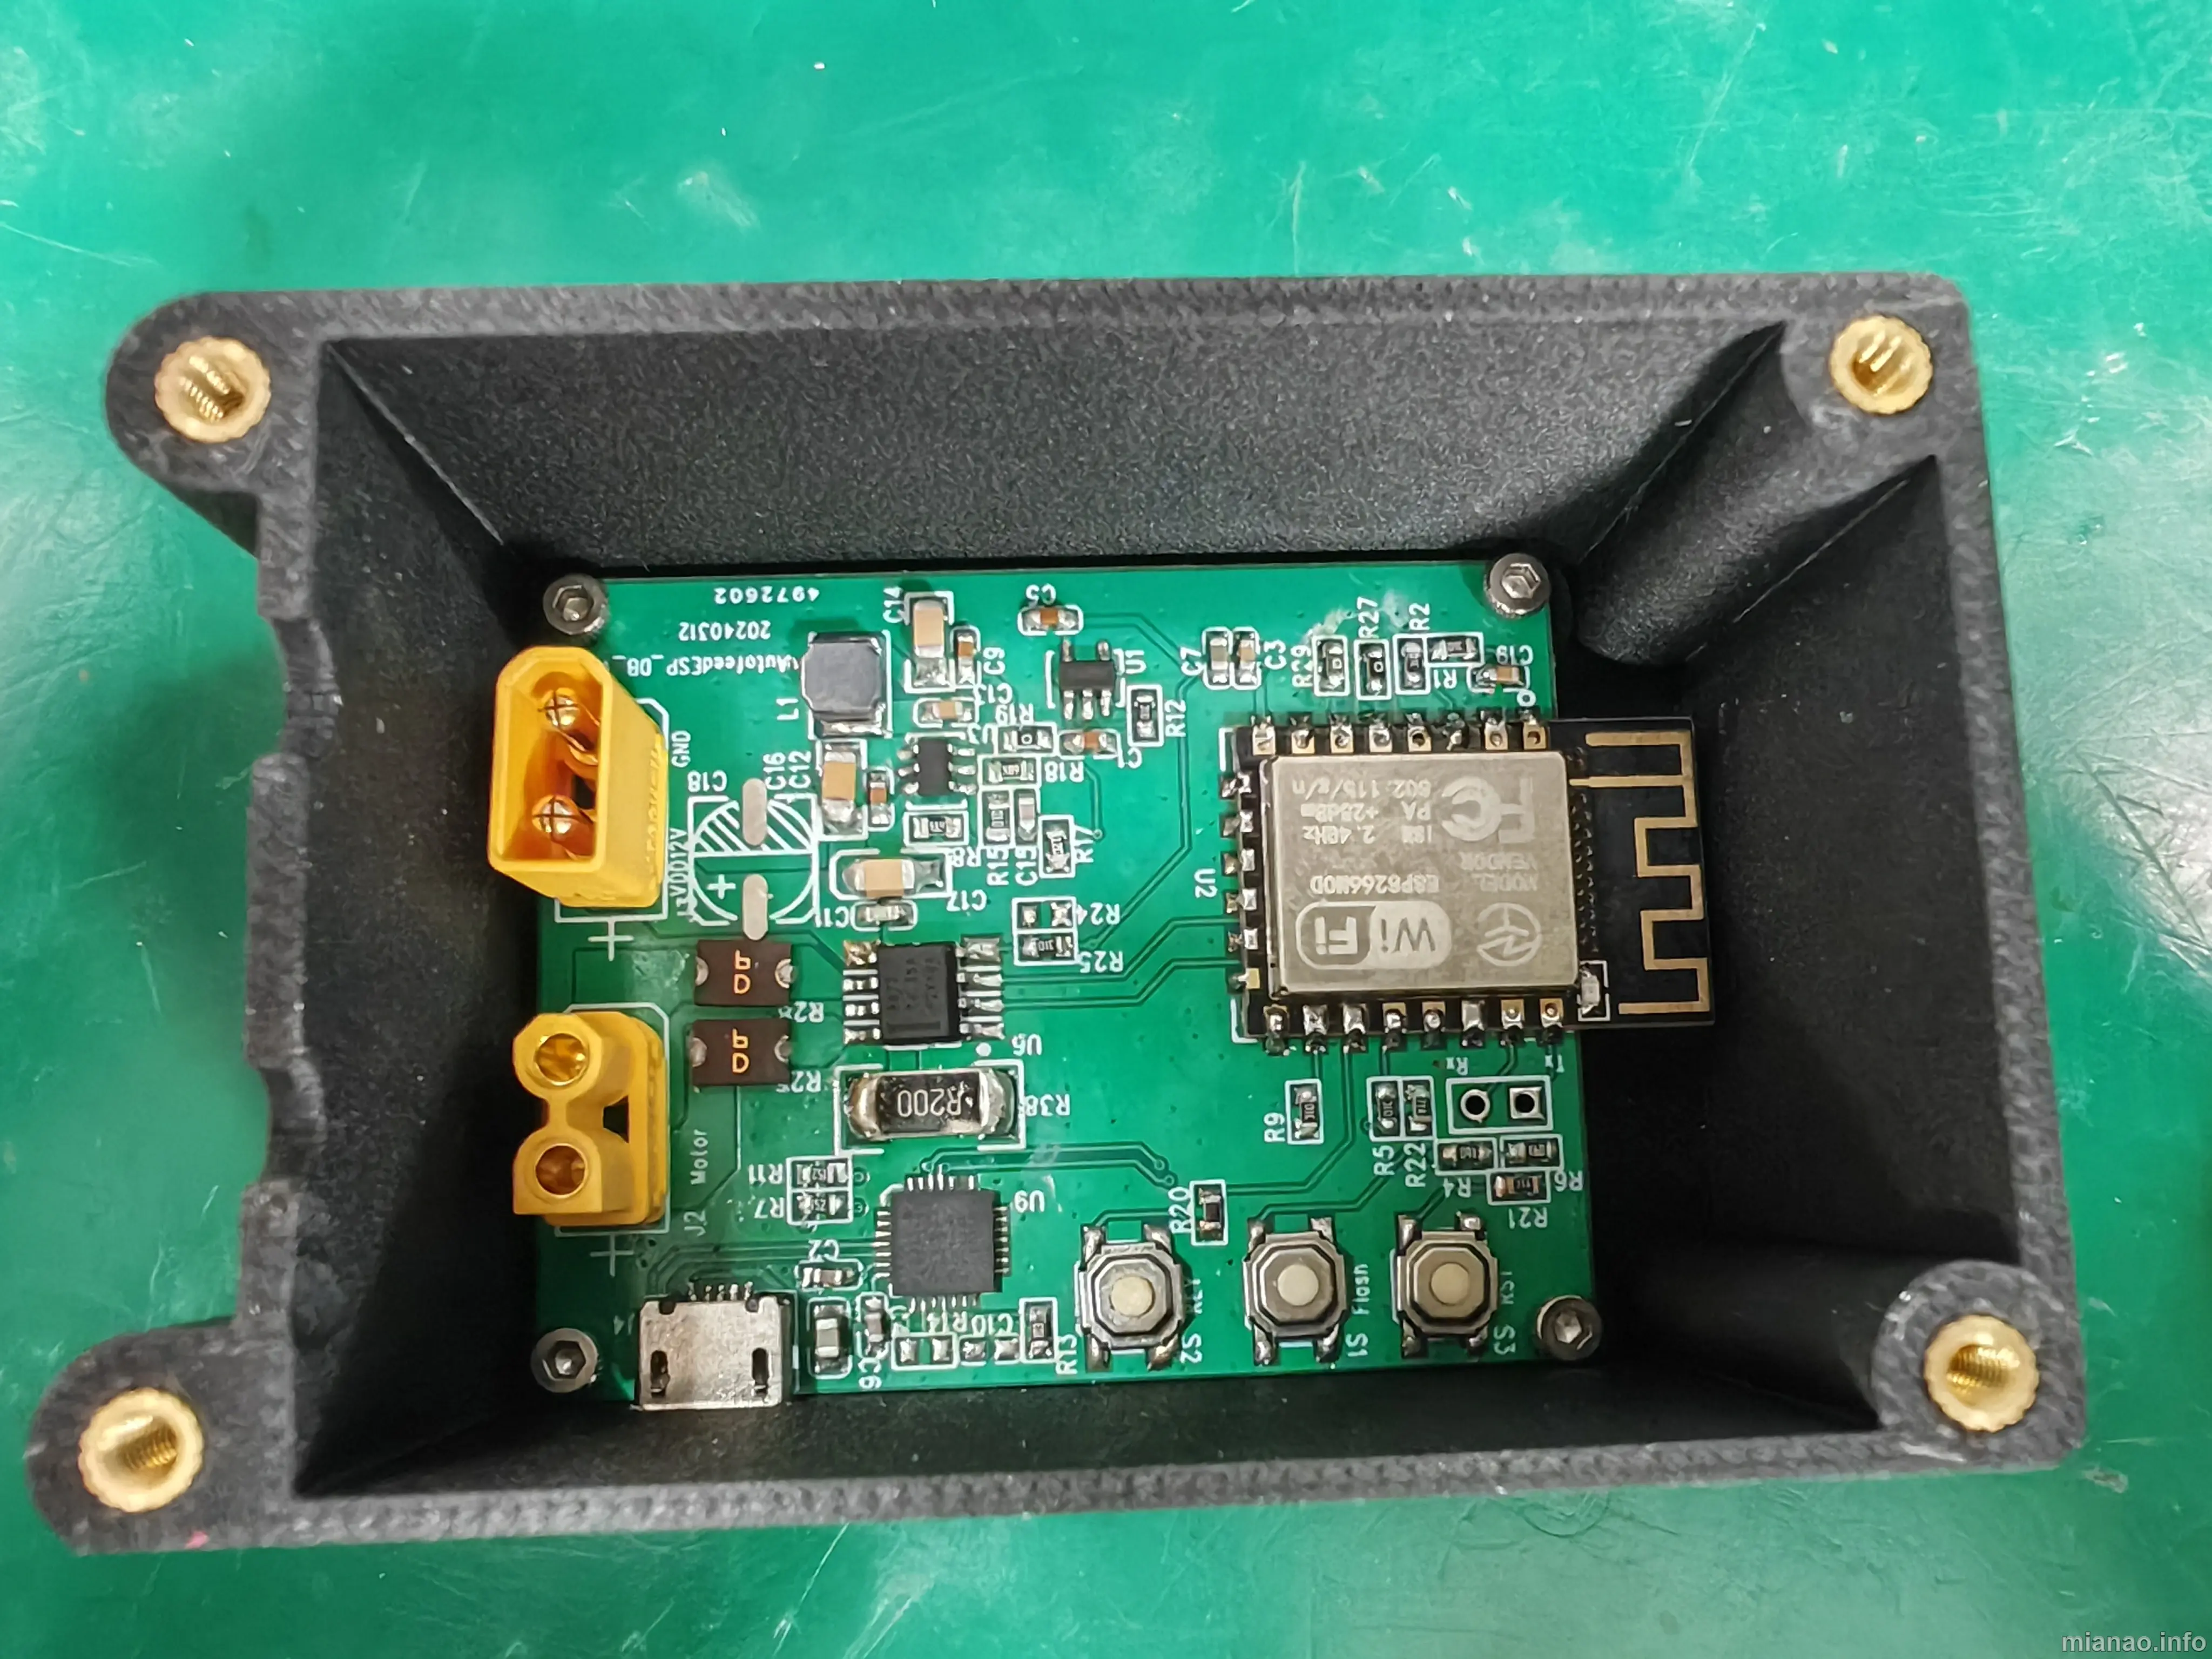
手上有好几个 ESP8266 模块,还是几年前买的,一直都没用。所以方案就是基于 ESP8266 联网,控制电机转动。
电路设计很简单,ESP8266 模块负责联网和 PWM 控制电机,我加了一个 USB 转串口的芯片,方便调试(因为我 CP2102 芯片有好多)。因为我的电机是 12V 的减速电机,所以还需要 DC-DC 电源芯片,可以直接转到 3.3V,我是因为搞了个 USB 调试,所以又加了一个 3.3V 的 LDO,其实没必要。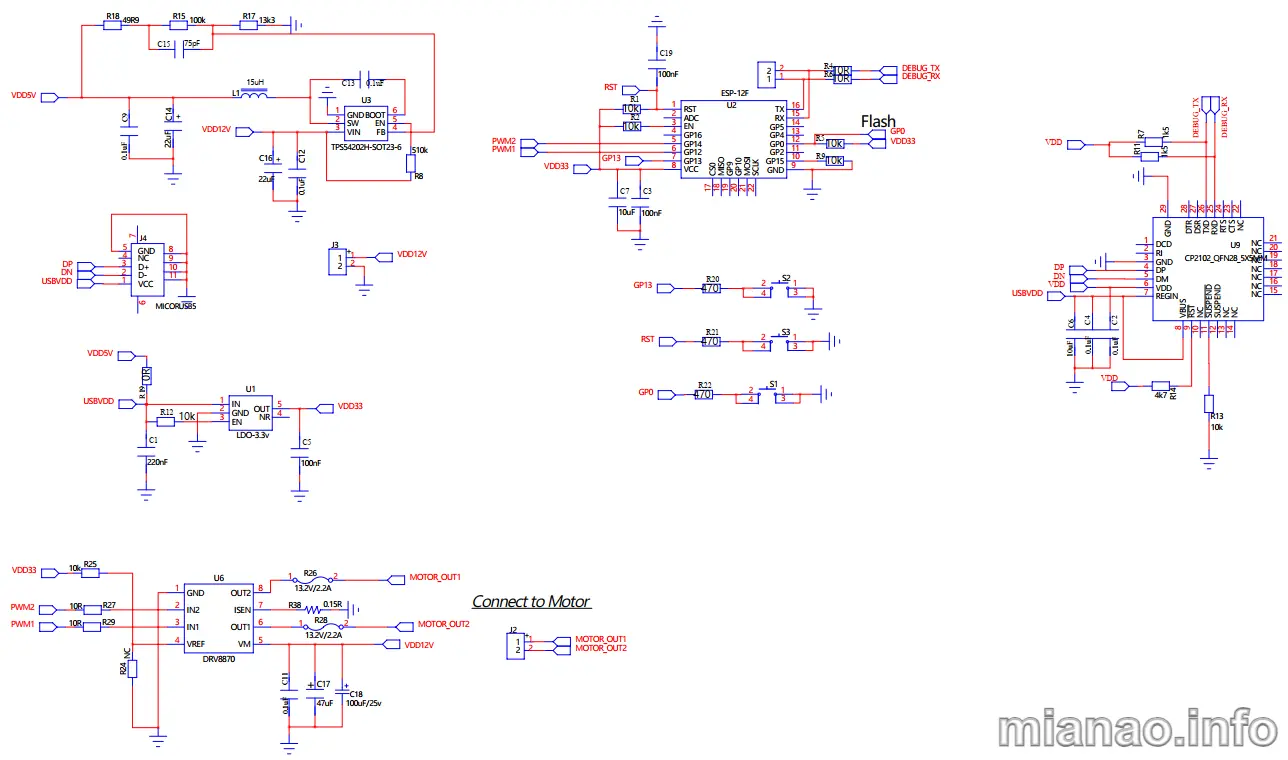
电路很简单,仅供 DIY 用。
软件设计
软件设计一种方案是 ESP8266 模块作为 Arduino 板联网控制;另一种方案是 ESPHOME,连到 HomeAssistant 控制。
两种方案软件都相对简单,Arduino 连物联网比较麻烦点,因为很少有给个人免费用的,花钱又没那个必要。而 ESPHOME 连到 HA 就有现成的 APP 控制了。
但是我喜欢把鸡蛋放到不同的篮子里,比如很多人搞软路由,黑群晖,HomeAssistant 等都放一块板上,我就不喜欢 ALL IN ONE,很可能一个挂,全部挂。所以我没有选择 ESPHOME 而用了 Arduino。
物联网云我选了好久,国内的几乎没有个人用的可以选的了,知名的都要收费,不知名的也不敢用啊。最后选了 Arduino IoT Cloud,免费用户支持 2 个设备,对我来说已经够了,测试了一个多月,还是比较稳定的,响应速度也快。但是,Android 端 APP 需要 GMS,没有框架是运行不起来的,我估计是出于安全性的考虑吧。
首先要在 https://app.arduino.cc/ 注册账号,然后再添加代码,烧录到设备。
ESP8266 的 IO 定义如下图: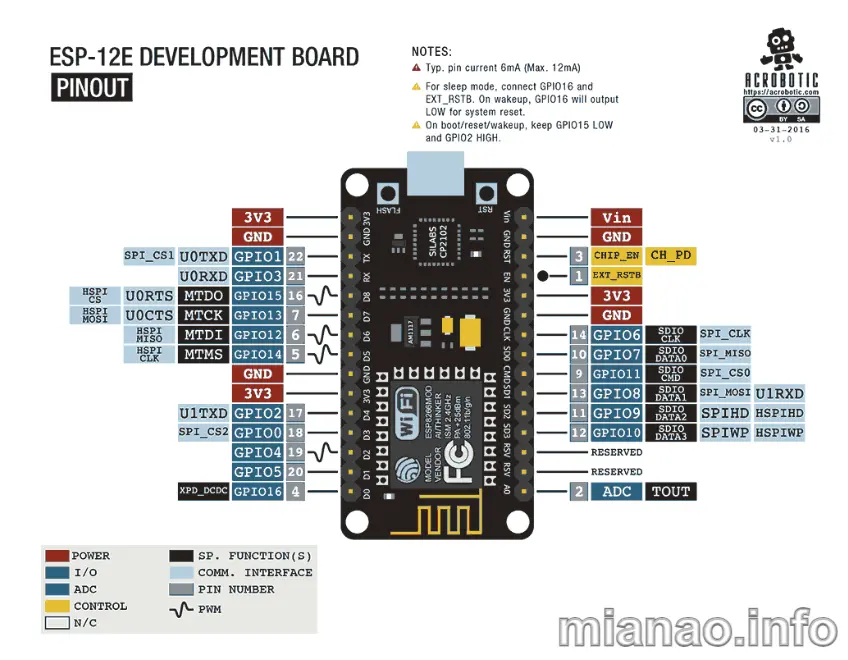
Arduino 代码很简单,就控制电机转动时间,如下:
1 | // Arduino cloud 的物联网函数,有 key 及 WiFi 用户名密码等 |
ESP8266 可以通过浏览器直接烧固件(要安装官方插件),不过要先按住设备的 flash 按键(上电时 GPIO0 为低时 ESP8266 模块进入烧写模式) ,再给设备上电,然后点击上传固件。
注:
经过我长时间使用,发现 cloud 烧录这种方式还有 bug,例如会出现:
No associated device yet
但实际上我确定已经关联设备了,并且更换电脑,更换账号都不好用,之前连接好的设备修改了一下参数也显示这个。还是建议本地编译上传到设备。
下载 Arduino APP,登录,可以看到设备上线了,点击按键控制。
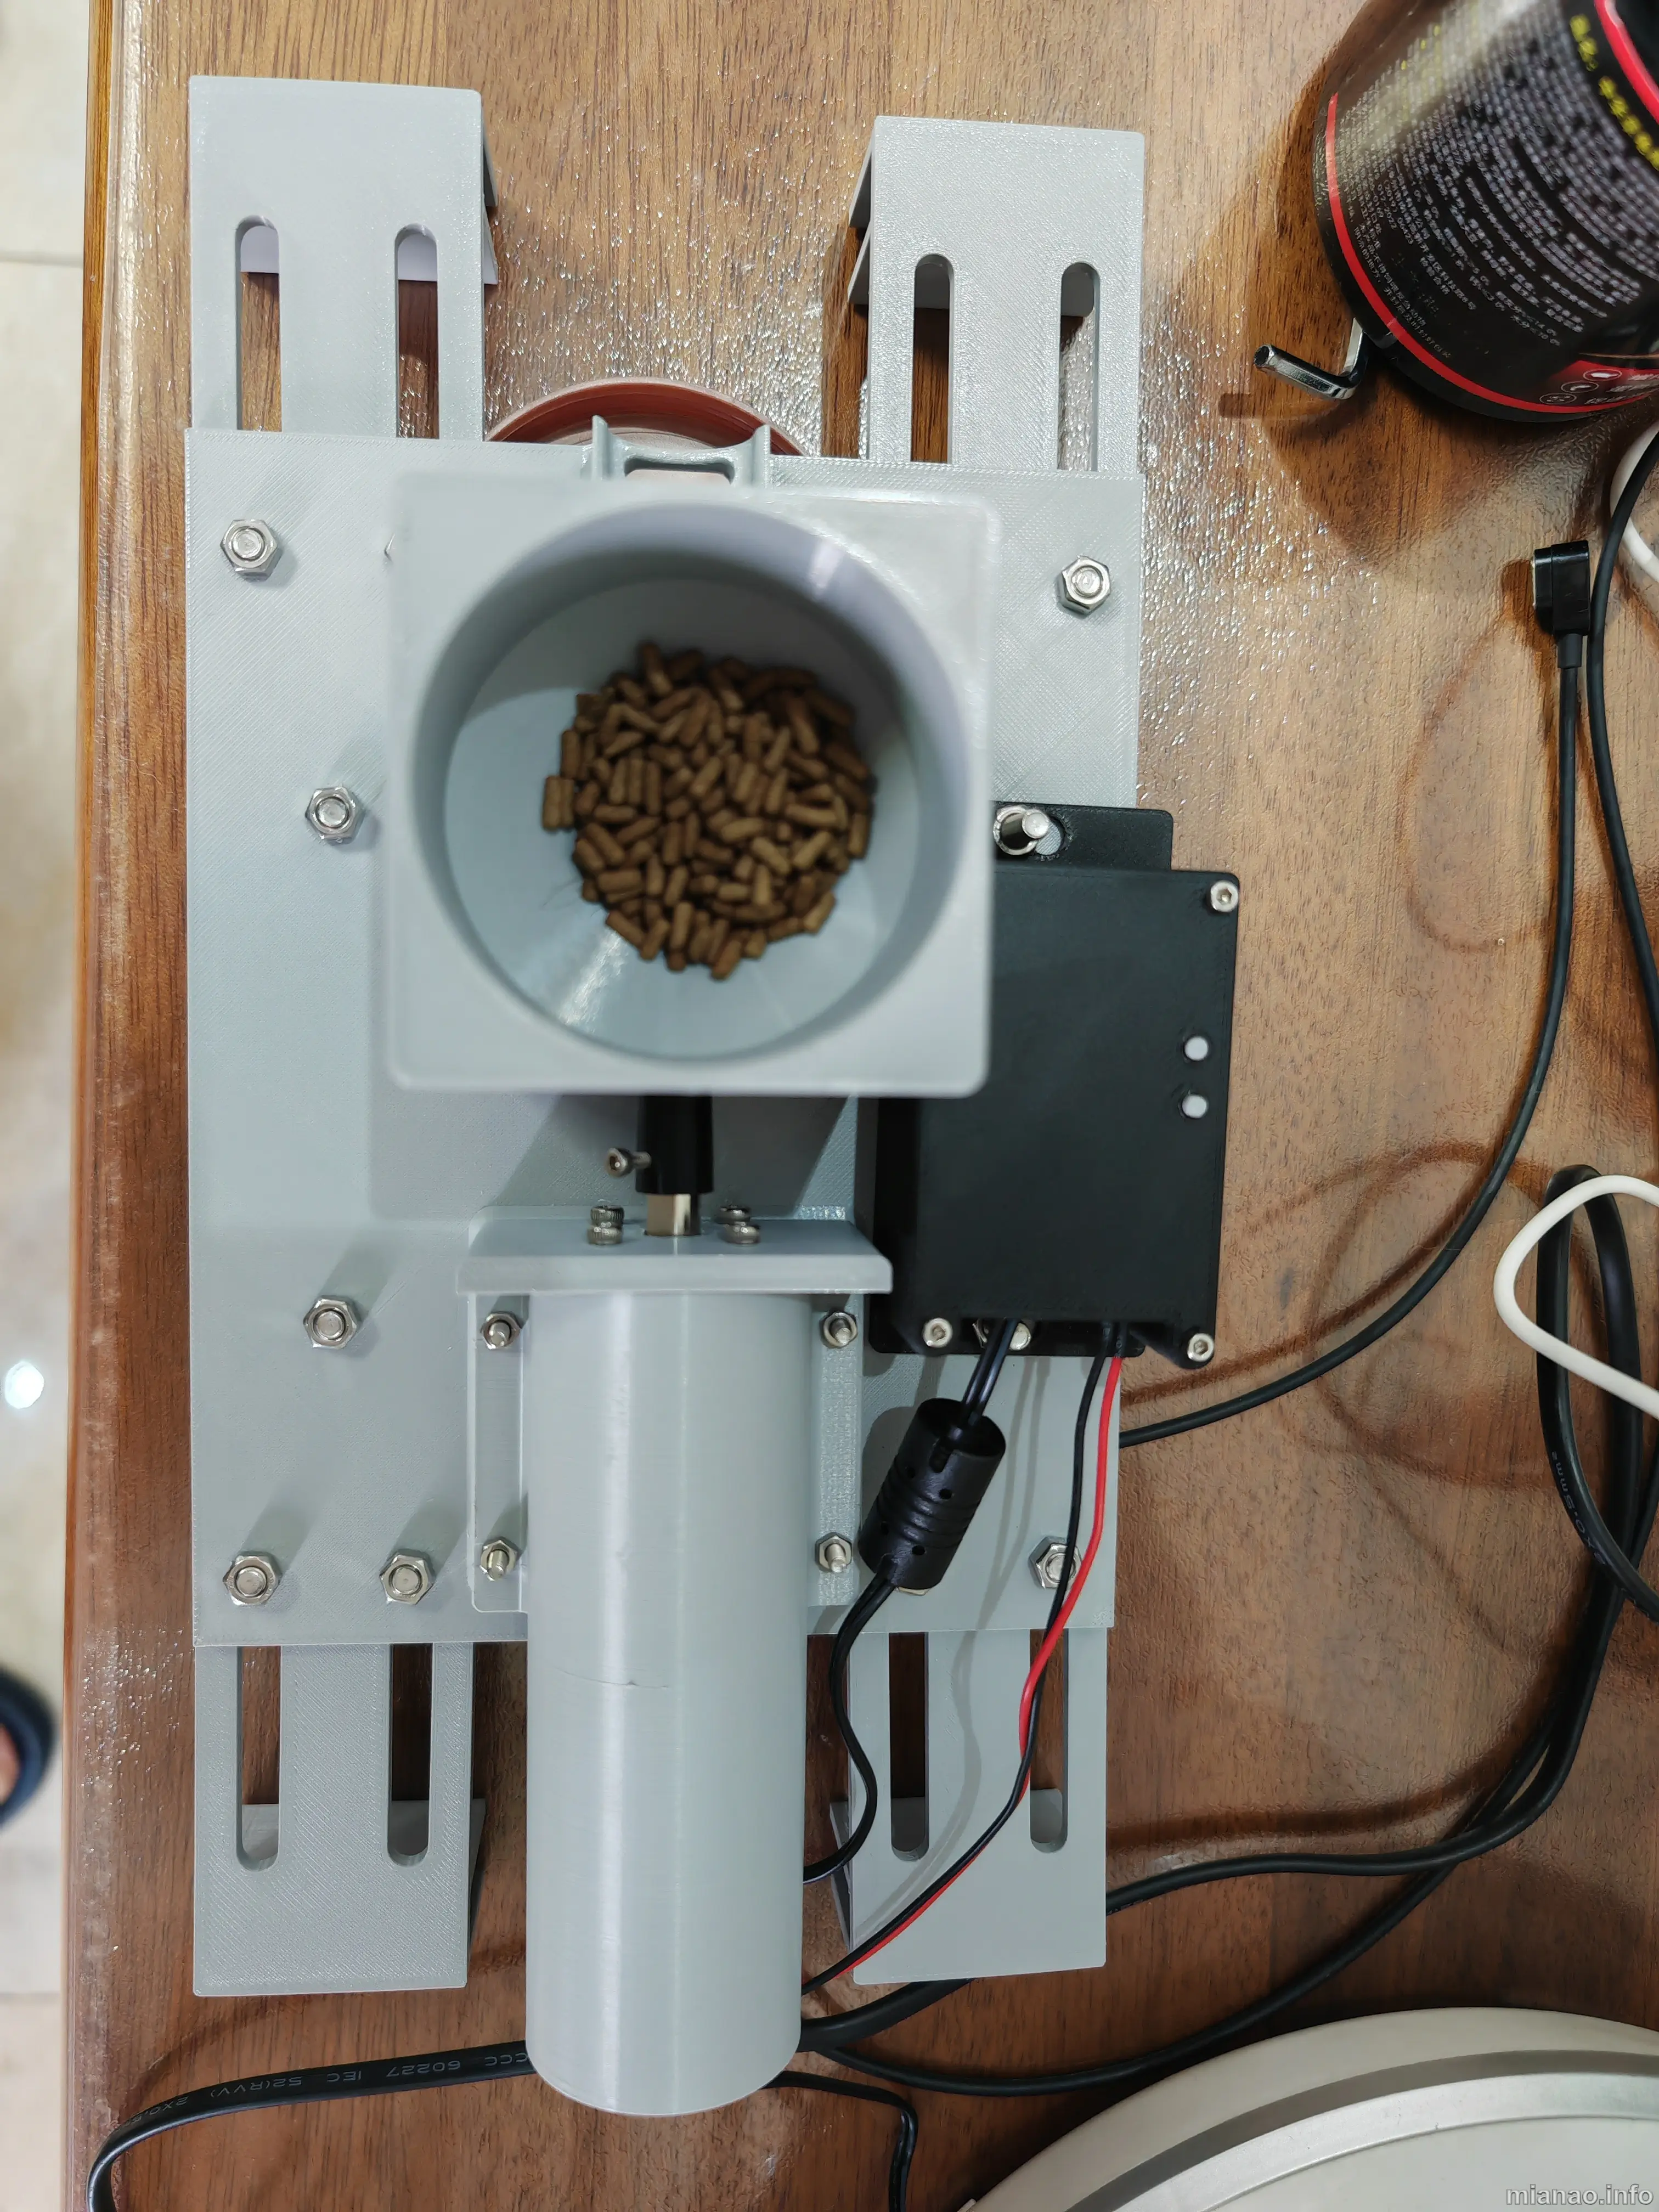
安装后的喂食视频:
至于 Arduino IoT Cloud 怎么用呢?似乎很少有人写,且听我下回分解吧。
Arduino Cloud IoT 使用入门指南
以上所有原始文件在此,仅供参考,有问题自己搜索或问 AI:
https://github.com/harry10086/Autofeed
奖励链接: 欢迎使用推荐链接,新用户充值有奖励 https://www.vultr.com/?ref=7342510